Welcome to a Lyrr Starter Guide on using the Hulk in Marvel Super Heroes!
This typed instruction is the companion doc to the AV Starter Guide Series. If you wish, you can view the video by either clicking the above image or the Listen/Watch button right below to open a window at the bottom of this guide. Then you can pause, stop, rewind, full-screen, or even just hide the video to hear the audio while you browse thru.
MOBILITY
BASICS
--STANDARD MOVEMENT
DASH
--CANCELING
--CANCELING INTO JUMP
--OVER PROJECTILES
--CROSSING OVER
BACK ROLL
--CANCELING
--DODGING ATTACKS
GAMMA CHARGE
DEFENSE
BASICS
--AWARENESS
--MINDSET
--CHIP DAMAGE
--THROWN
--TECH HIT
--TECH ROLL
--DIZZY STATE
OFFENSE
BASICS
--NORMALS
BEST NORMALS
--DISTANT POKE
--STANDING HEAVY
--GROUND LAUNCHER / OTG
--AIR LAUNCHER
--ANTI-AIR
--ANTI-CROSSUP
--JUMP IN POKE
--CROSSUP
--AIR TO AIR
--AIR HEAVY
"Let's rock!"
This instruction aims to balance a casual perspective for fighting gamers with some hefty scoops of info for the old heads too. Whether you're here to learn Hulk to play as him, or use this knowledge in match-ups against him, all are welcome to get anything ya want out of this guide the way that you like to view it. You'll notice that sprinkled throughout this page there're these AV notations ( ex: [AV1 - 00:00]), that'll mark a section's related video and time stamp of the topic from the AV Starter. Hopefully, this will make it easier to keep track as you pause, rewind, or skip ahead at any time while reading further details that are provided here. You will also see colored text like the one below that displays an important tip.
Take note that by clicking those AV links it might open a new tab to the video.
Another format you'll see is italicized text in this way. This is usually a quote from one of the videos that compliments and connects to this guide:
"If you want additional explanation that don't get covered here..."
There are going to be parts in the presentations that aren’t on the page like the video's DISCLAIMER [AV1 - 01:44] and THE MANTRA [AV1 - 02:34] that covers HBTH.
However, there's also gonna be explanation here not covered in the clips, but either will still drop their share of knowledge even if you stick with just one, so digest it however you prefer.
Full course or a la carte is entirely up to you!
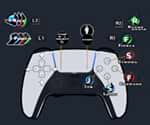
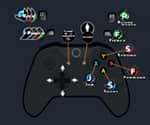
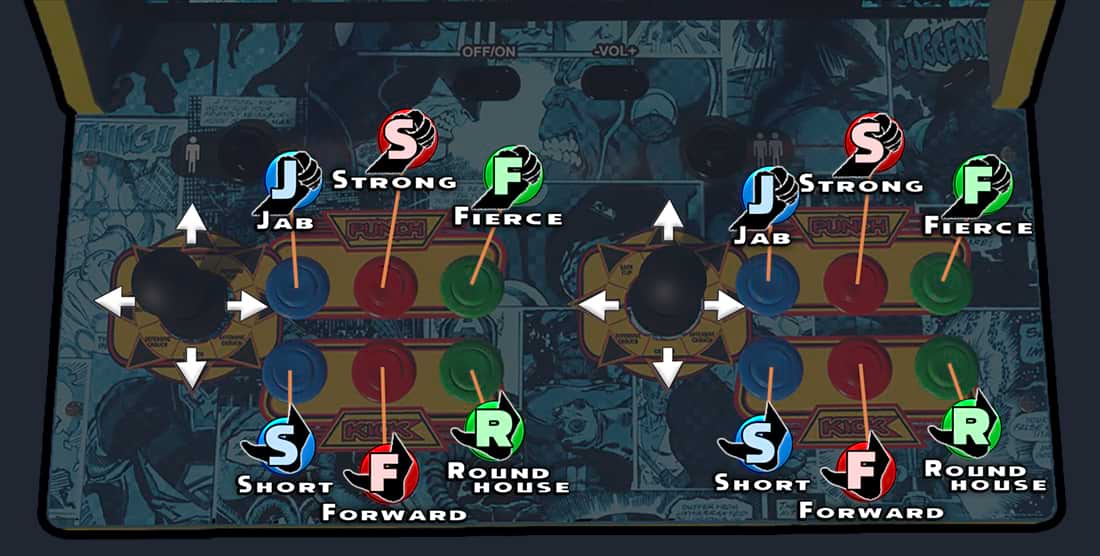
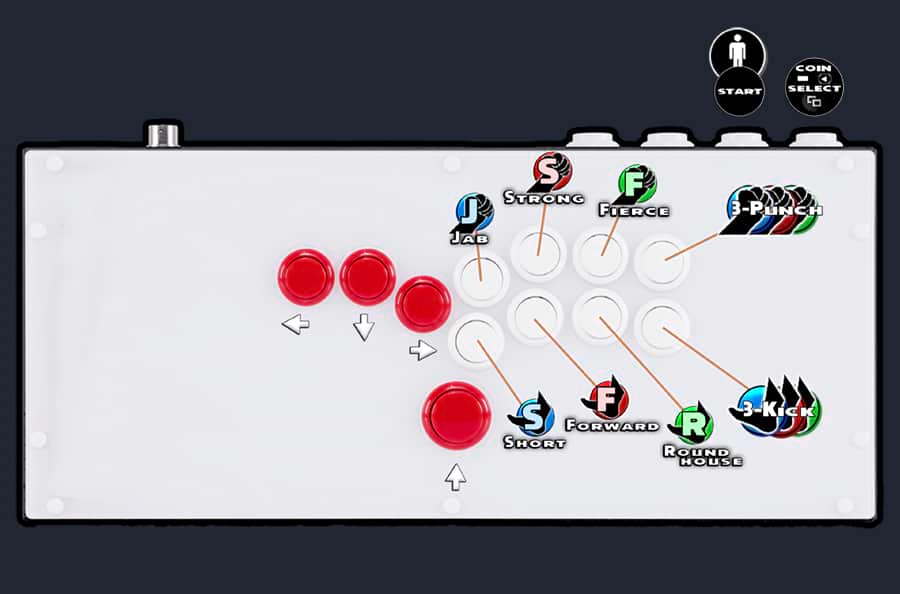
A variety of controllers are used in FGs (fighting games). Here’s some standards with typical layouts for this game.
|
|
Playstation×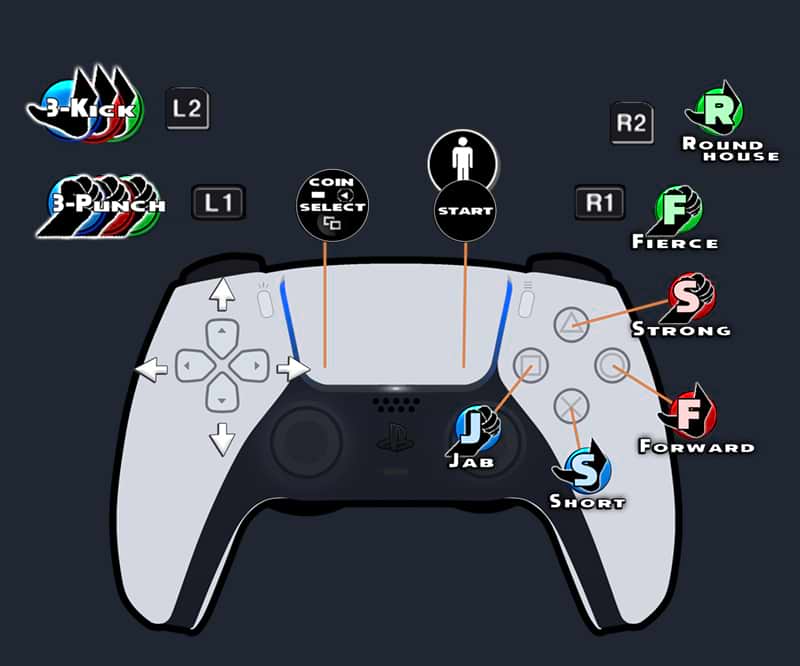 A PS5's controller layout which would be similar to a PS4. Select and Start are usually the corners of the touchpad.
|
|

|

|
Keyboard× A basic keyboard layout. There are innumerable possibilities how someone could set this up on PC.
|
Mixbox×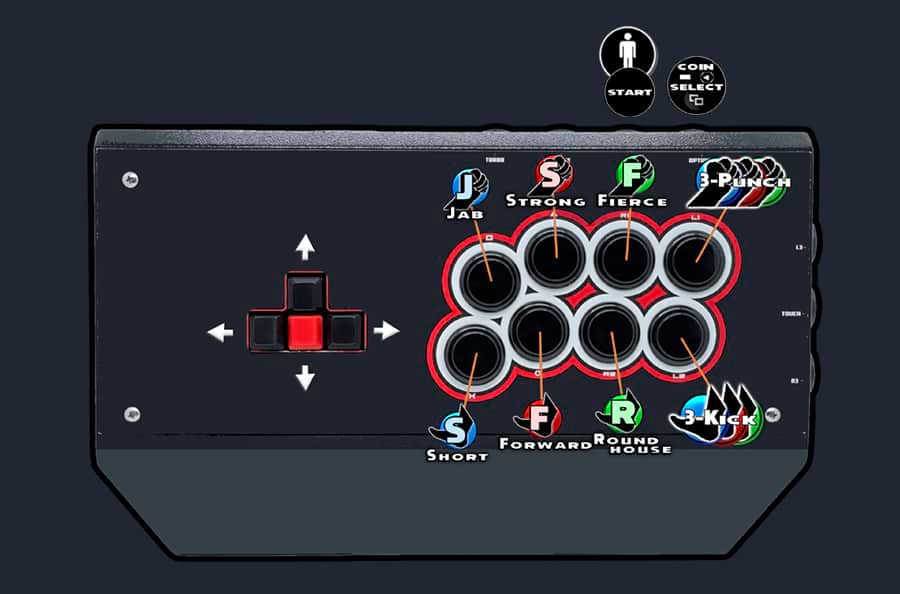 A Mixbox layout. Leverless, like a Hitbox, but for those who prefer an arrow key directional setup like a keyboard.
|

Access× A vastly customizable controller by Sony. The buttons are interchangeable, stick is adjustable, and provides support for extra control devices.
|
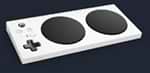
Adaptive× An adaptive controller by Microsoft that has nigh infinite possibilities. Has motion touchpads and supports a huge range of attachable control devices.
|
 The standard original. You can now find this setup on Arcade1Up machines.
 A leverless arcade deck. These have become very popular.
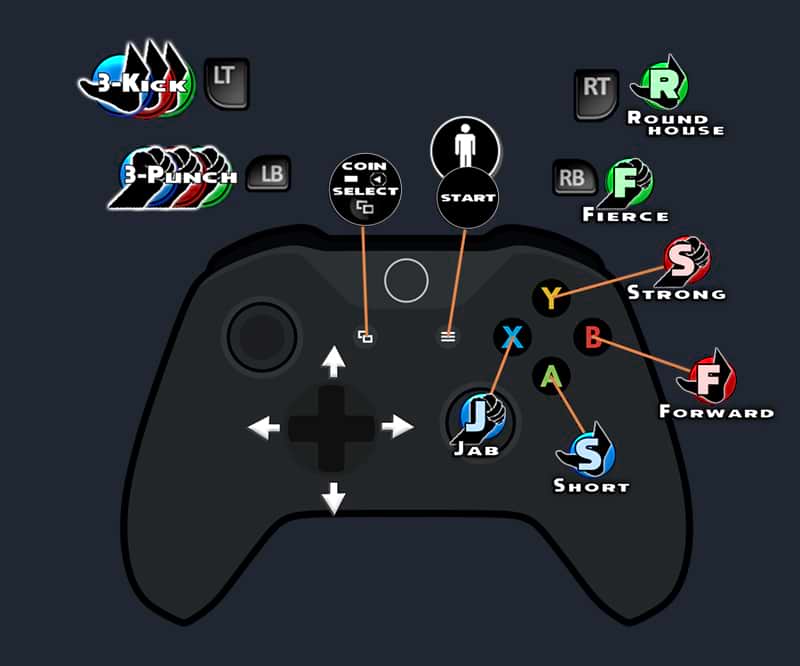 An Xbox controller layout. A standard gamepad for PC as well.
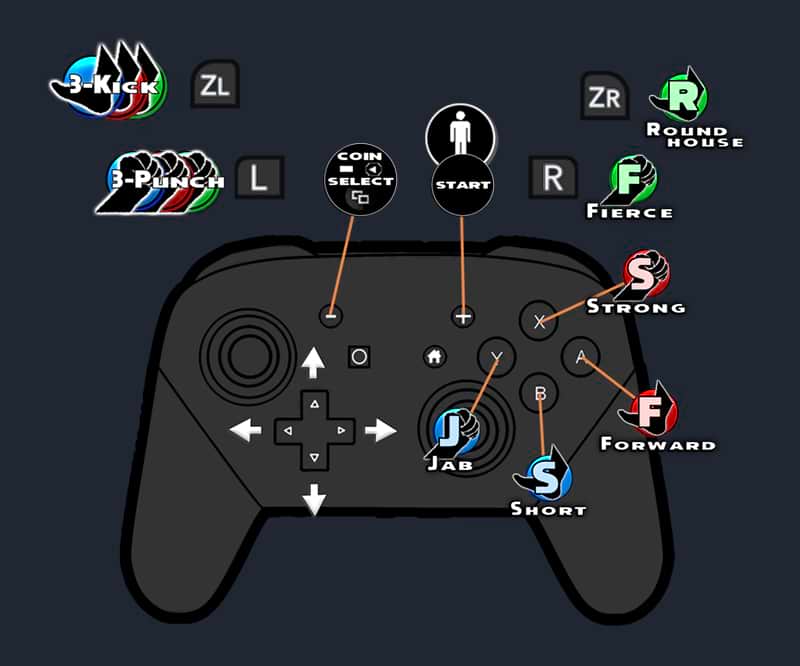 A Nintendo Switch layout. This is the propad version.
 A general fightpad layout. Each major system usually supports one.
If you prefer different mappings then it’s an  absolute must that you change it the way that feels right for you to optimize your gamma-powered potential!

								    No matter what you set up though, it's always good to play wired for the least amount of input delay.
Here’s a basic screen layout of Marvel Super Heroes.

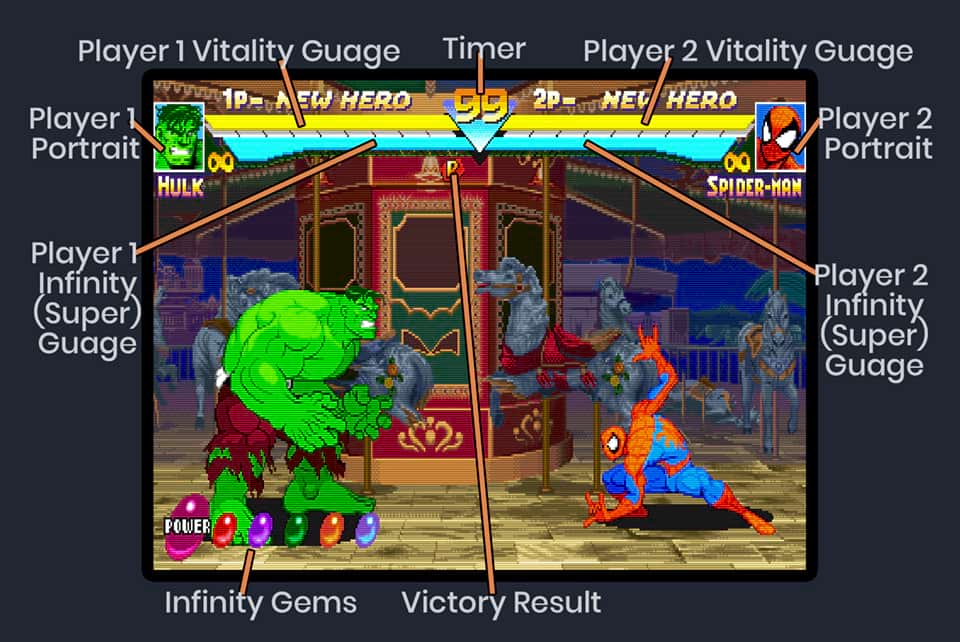
*The "NEW HERO" label above each player's Vitality Guage will show the number of wins they have as long as they are victorious and do not restart the game.
Moving On [AV1 - 04:29]
BASICS
STANDARD MOVEMENT
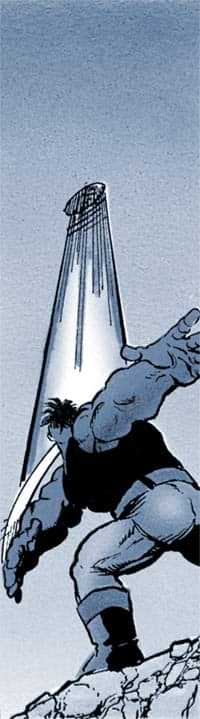
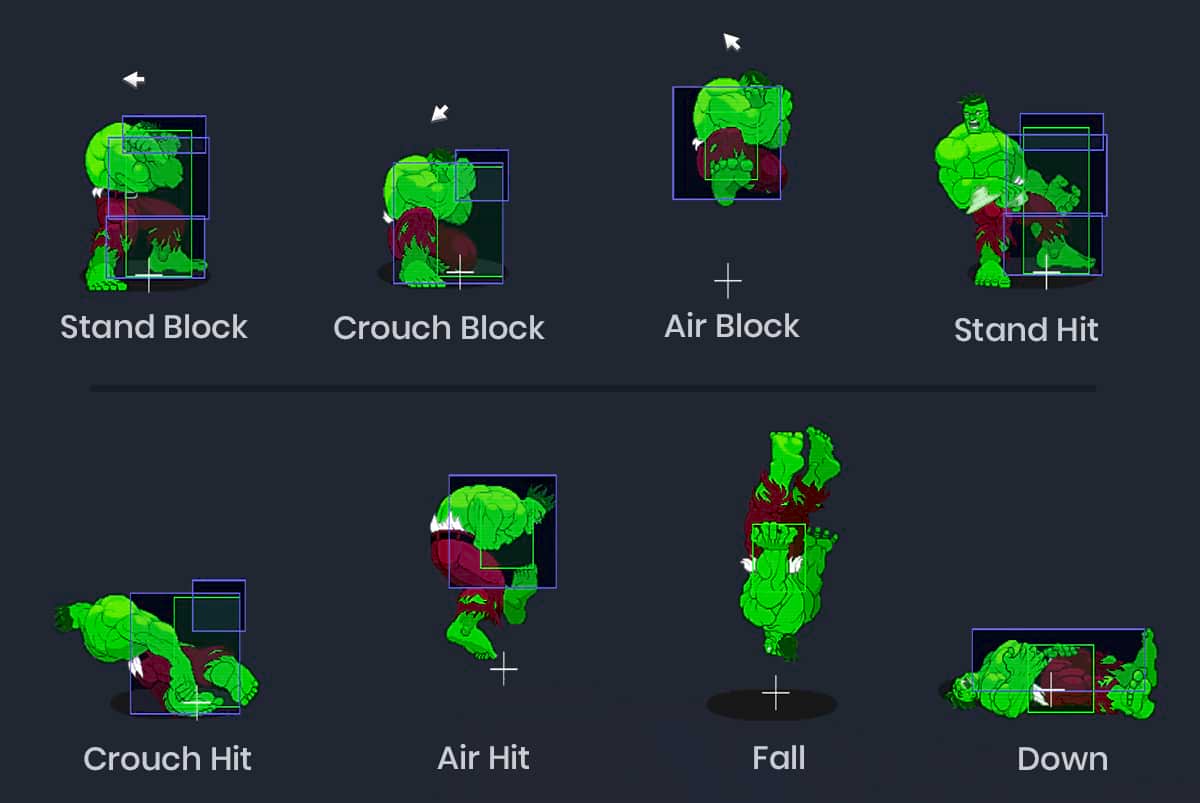
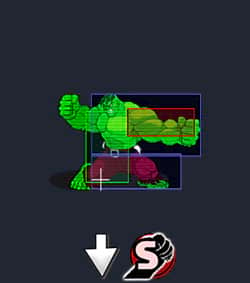
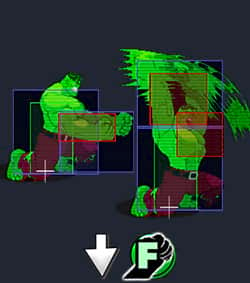
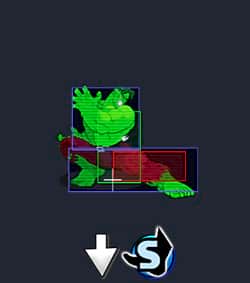
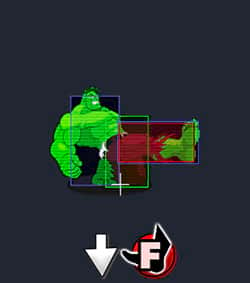
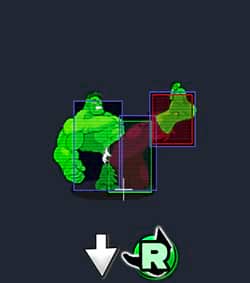
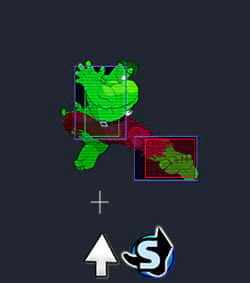
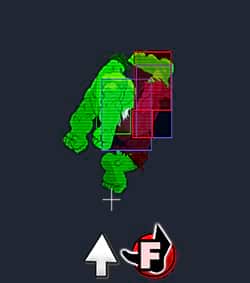
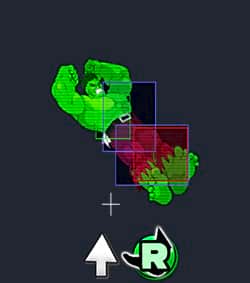
One big foot in front of the other. Getting a good feel for Hulk's mobility in this game helps you find your own special tempo.
Here's a quick pic of generally what that looks like while showing some of his hurtboxes (areas where opponents can hit him).

There's nothing like putting those fingers to buttons for understanding his movement yourself, but this is a clip comparing Hulk's basic walk towards and back speed with each character to give you a taste. [AV1sB - "Walk With Me"]
You can also hop over to this short to see how Hulk's jump stacks up with everyone on the roster. [AV1sC - "We Bounce"]
Fact is (no sugar) our biggun's basic movement speed is typically on the slower side of the majority in this game, but that can be to your benefit too! Especially if you make your opponent underestimate his short burst quickness with Dash.
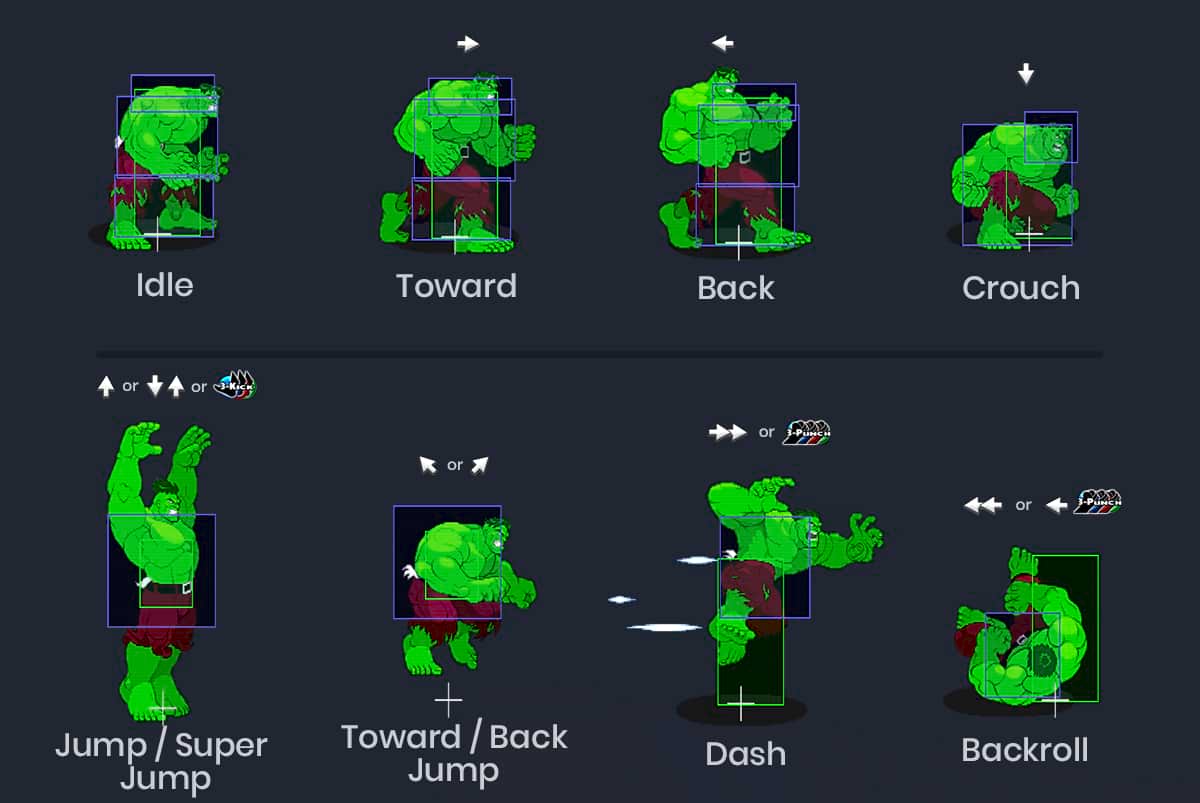
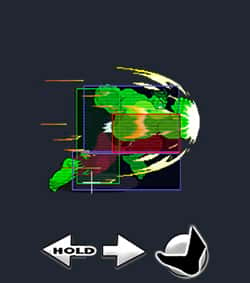
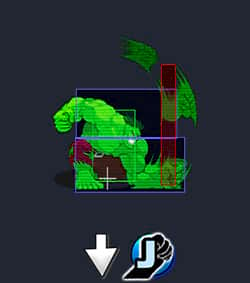
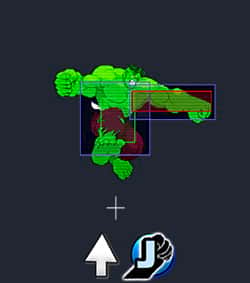
DASH
Toward-Toward or 3-Punch
CANCELING
"Clearly dash canceling isn't that great from across the screen, but a short distance one is always useful".
In this regard, the Toward-Toward version provides less chance for a mis-input compared to the 3-punch one. When someone wavedashes they usually hit the 3-punches and cancel it into Down then repeats for faster ground movement. But the Gamma Lift (Down-Down 3-Punches) can come out too easy with Hulk since all it requires is an extra Down input to stop your Dash and then you're stuck in recovery just asking to get touched up.
CANCELING INTO JUMP [AV1 - 05:01]
On average, Dash is mainly a distance closer for spacing or a quick poke. To build on that, you can use Hulk's ability to cancel that Dash into a jump for fast arial movement across the stage.
There's a "Ha!" that Hulk says audibly when he goes to Dash. You can show this to your opponent (to plant a seed) and you can also hide this from them if you cancel into a jump fast enough. If you're on the ground though ususally they can see the quick input come out for a dash regardless if there's no sound, but if you hide it amidst a regular jump, just as you land, you can startle them by closing the distance quickly.[AV1sD - "Dash Jump Sneak"]
Here's a short showing you an example.
Even if that's something they get wise to, you can fake them out later by then doing a dash with the "Ha!" and canceling it into a crouch to see if they'll whiff, so you can serve 'em a punish. In so many words, keep em guessing and boog up their timing.
You also got a lil defensive utility with the Dash that can make pressuring easier on you and worrisome for your foe.
OVER PROJECTILES [AV1 - 05:09]
"Outside of pressuring, a simple Dash Forward can also bypass certain projectiles..."
Here are some of the projectiles that Hulk's dash can pass over or thru depending on the spacing:
Cap's low (Jab / Light Punch) Shield Slash
Blackheart's low (Jab / Light Punch) Dark Thunder
Psylocke’s low (Jab / Light Punch) Psi-blast if it's at your feet
All Juggernaut's Earthquakes
All Spidey's Standing Web Balls
These are good to prevent a lil extra chip, if you don't want to chance a jump (and are far enough away), or you want to try a punish while the opponent's still in recovery from their special.
Out of those, the ones safest to punish are Blackheart and Juggs (if the spacing's right and they don't have a Super or Gem to cancel into). The others, it's 50/50 that they could just be trying to set you up for a punish after you Dash over their projectile. Might consider, if you do Dash over, blocking low to try and see if they'll bite, so you can punish back. But feel the timing out, because you might just catch em wide open as soon as you hop over.
CROSSING OVER[AV1 - 05:43]
Hulk’s Dash also allows him to cross sides with an opponent. This is pretty situational and not real practical.
But hey, you find the opportune space to slide this in, then style points to ya.
Addition: There might be some value in the crossing over for those wanting to lab this thanks to the discovery by BigBoiBronx145. You can see the clip here that they've uploaded to YouTube. "Intersting Hulk discorvery for MSH?"
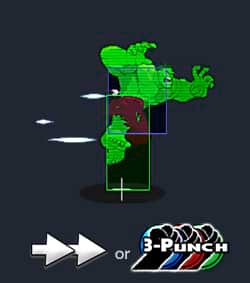
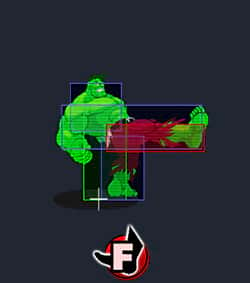
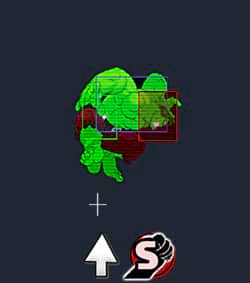
BACK ROLL
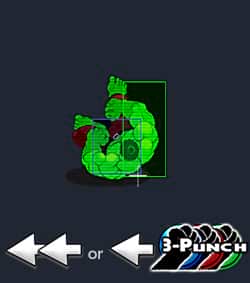
Back-Back or Back + 3-Punch
Back-Back is the preferred way to Back Roll, but you may find a use for the 3-Punch version outside of this guide’s recommendation, so don’t rule it out.
CANCELING
"Canceling the Back Roll can be ideal for shimmying super fast back just out of reach of attacks sometimes."
So to cancel a Back Roll one usually hits Back-Back and then Down-Back before the roll animation comes out completely.
You can even do a Back Roll that slide cancels into a Jab poke to wear on an enemy, but the catch is it can put you kinda far to combo into anything (outside of Standing Fierce) afterwards.
DODGING ATTACKS [AV1 - 06:06]
For 2 bonus escape options you can dodge these projectiles with it:
Iron Man’s (Jab / Light Punch and Strong / Medium Punch) Unibeams
Captain America’s mid (Strong / Medium Punch) Shield Slash
Iron Man's would be tough to figure on, because if he chooses the Fierce Punch version, then the animation of the beam goes on too long to avoid with the Back Roll. Would only use this sparingly even as a last resort, if you have no other options, like you just landed from a jump where Tony is about to K.O. you by chipping you out.You can consistently dodge Cap's Strong Shield Slash though.
You become adept at Back Roll canceling, you can frustrate the mess out of someone. Watch putting your back too close to the wall and get nasty by capitalizing on their misses.
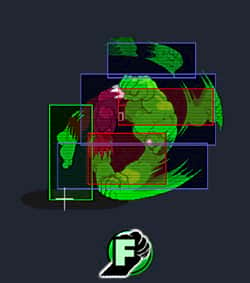
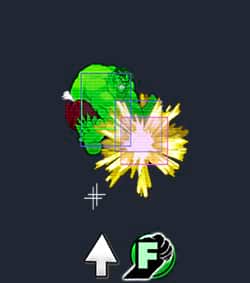
GAMMA CHARGE
ALTERNATIVE MOVEMENT [AV1 - 06:19]
"Even though this is primarily for attack it can be used as a pursuit tool, within reason, and as a means of escape if you committed to a charge a bit too early."
Using this for mobility is very touchy, because of the recovery time, but with anything, never say never. A split-second veer off in mid-air could save your backside.
Lock and Key [AV1 - 06:35]
BASICS

AWARENESS
"Learn where you're hurtboxes are and how other characters could potentially cross you up."
MINDSET
You don't want to wall-up till ya get chipped or timed out, but it's crucial to be patient with Hulk when you're tempting for that window of opportunity to "sauce em." You're going to dish out some hurt, but it's nice to be aware of your own big green plate to get em to whiff or how to block to retaliate. If ya get opened up, so what! Don't get tight. Reset your focus. Find the window to block again (or poke) for establishing the tempo you like even if they keep trying to force their own.
CHIP DAMAGE [AV1 - 07:25]
This is something every character takes while blocking Specials, Supers, or some Gem powers (ex: Power and Reality). You can get K.O.ed from chip while blocking, so watch that health bar when it gets in the red.
THROWN [AV1 - 07:35]
If ya block a lot there's a possiblity you can be scooped (aka thrown). Assuming if you're here you already know this, but for those reading this guide who don't, in fighting games throw beats block just as block beats attack, but attack beats throw. Even so...if you happen to get thrown you have some options available to deal with it.
TECH HIT
This is what flashes on the screen upon performing a throw tech or the action of "tech-ing the throw." You hit the Strong (or the Fierce) Punch with a Towrd or Back direction just as they grab ya, you can get out of a throw completely. Gotta be quick and expecting it, because this can be a tight window, but you'll void all damage and have the chance to flash recover.
If you hit it a little late sometimes you'll still take the initial damage, but halve it from not hitting the ground hard and still be provided an opportunity to quickly recover.
TECH ROLL
Some people call this Recovery Roll, Safety Roll, or Safe Roll. You'll still take the damage of the throw, but inputting Back to Down (Quarter Circle motion) plus Punch, just before hitting the deck on the fall, will let ya roll swiftly towards or away from the opponent. During the roll you will be invincible until you get to your feet again. This'll help prevent a potential OTG (off the ground) punish that could leave you open. It's well worth it to practice this till you're able to do it consistently from every height and throw. Be aware that you can still roll into an attack, so it's a good idea to think defensively first on the roll then recover before you try to get your licks in unless you cross them up. There's a special instance where you cannot roll safely, but we'll discuss that at a later time.
DIZZY STATE [AV1 - 07:46]
When you take enough damage Hulk's portrait will go from blue, to yellow, to red, and then flash into rotating where the character goes into a Dizzy State (or Stun State).
To lessen the time you are vulnerable in that position, mash all attack buttons and move the directions back and forth as quickly as possible.
Hulk can take around 60 points of consecutive inflicted damage before becoming Dizzy.
Casus Belli [AV1 - 07:53]
BASICS
NORMALS [AV1 - 08:42]
Here is a list of all of Hulk's Normals beside their damage values and frame data. Hulk has the rare benefit of causing chip damage on blocking opponents with his Normals. He can't K.O. an opponent with a Normal's chip, but you're always guaranteed some damage by poking and pounding on a guarding opponent. (the exception being if they activate the Space Gem)
| Name | Damage | Frames | |
|---|---|---|---|
 |
Jab Light Punch |
09 - ob 1 | S07 - A03 - R06 |
 |
Strong Medium Punch |
14 - ob 1 | S11 - A03 - R18 |
 |
Fierce Heavy Punch |
22 - ob 1 | S13 - A02 - R40 |
 |
Short Light Kick |
09 - ob 1 | S07 - A02 - R09 |
 |
Forward Medium Kick |
14 - ob 1 | S11 - A05 - R12 |
 |
Roundhouse Heavy Kick |
22 - ob 2 = 2 HITS 10 - ob 1 = 1 HIT |
S10 - A08 - R29 Low hitbox start S12 - A06 - R29 High hitbox only |
 |
Crouch Jab Crouch Light Punch |
09 - ob 1 | S08 - A02 - R09 |
 |
Crouch Strong Crouch Medium Punch |
13 - ob 1 | S11 - A03 - R17 |
 |
Crouch Fierce Crouch Heavy Punch |
24 - ob 2 = 2 HITS 14 - ob 1 = 1 HIT |
S10 - A04 - R33 Low hitbox start S12 - A02 - R33 High hitbox only |
 |
Crouch Short Crouch Light Kick |
09 - ob 1 | S08 - A02 - R14 |
 |
Crouch Forward Crouch Medium Kick |
14 - ob 1 | S09 - A04 - R11 |
 |
Crouch Roundhouse Crouch Heavy Kick |
26 - ob 1 | S11 - A04 - R24 |
 |
Jump Jab Jump Light Punch |
09 - ob 1 | S8 - A11 - R~tbd |
 |
Jump Strong Jump Medium Punch |
11 - ob 1 | S10 - A08 - R~tbd |
 |
Jump Fierce Jump Heavy Punch |
20 - ob 1 | S12 - A05 - R~tbd |
 |
Jump Short Jump Light Kick |
09 - ob 1 | S9 - A10 - R~tbd |
 |
Jump Forward Jump Medium Kick |
11 - ob 1 | S10 - A09 - R~tbd |
 |
Jump Roundhouse Jump Heavy Kick |
14 - ob 1 | S11 - A09 - R~tbd |
Name: Constitutes what the move is typically called.

							  Damage: The first number before the "- ob" represents raw (non-blocked) damage while the number after "ob" (on-block) is chip damage. All of Hulk's Normals do 1 point of Chip per hit on block.

							  Frames: S = Startup when the button registers before the hitbox comes out.

						    A = Active frames that the hitbox can strike an opponent.

						    R = The number of frames in Recovery time (without cancelation) after the hitbox disappears up till the character returns to idle.

						    ~tbd = to be determined
The damage listed for the Normals was aquired from Fightcade (FC) Training mode. Characters full vitality is displayed at a 144 value. If you want to see a percentage approximation on a health bar from these attacks, the AV Guide starts using it at this part [AV1 - 08:09]
Be aware there are situations and characters where the damage values vary sometimes.
If you want to get real granular understanding Hulk's Normals, there's gonna be a spreadsheet link coming here that'll list all kinds of deets with further sorting options. Till then we are moving on to some of Hulk's better Normals from a starting perspective.
BEST NORMALS
BEST DISTANT POKE
Standing Jab (Light Punch)
Like the video says,
"Standing Jab is a great poke for distance (except against Wolverine*), and is always good for safest pressure to constantly be chipping away at the opponents health, but at max distance the only normal it combos into is Standing Fierce, so be aware of that later when ya get in the groove."
True, however...everybody (but Juggernaut, Thanos, or another Hulk) can duck it with a simple crouch. Here's the clip of 'em [AV1sE - "Duckin Jabs"] , so don't be slinging that straight out all the time.
You can flip usage and randomly try it as a space guage while you opt for getting in with a Standing/Crouch Short for a sure connect.
*For Wolverine, just forget you have a Standing Jab when he's on the ground. Only use Standing or Crouch Short as your dominant quick poke.
BEST STANDING HEAVY
Standing Fierce (Heavy Punch)
The range on this thing kinda nice, but you really wanna make sure this connects because of it's fat recovery unless you're on that Time Gem juice.
Yes, you can use this against Wolverine sometimes, but man at certain spacing...can we get a challenge flag on that dude's hurtbox?
Prime example: [AV1sF - "And Now The WHIFFERINE!"]
BEST GROUND LAUNCHER / OTG
Crouch Fierce (Down + Heavy Punch)
When it comes to shorter/thinner characters like (Spider-Man, Psylocke, Wolverine) if you hit them with an attack, then try to OTG with the Crouching Fierce, it might not Launch them, so be wary of trying to combo into it like that expecting to get them airborne.
BEST AIR LAUNCHER
Standing Roundhouse (Heavy Kick)
This is for an opponent jumping in. Alternately, a Crouch Fierce can be used for a small Air Launch.
BEST ANTI-AIR NORMAL
Standing Roundhouse (Heavy Kick) or Crouching Fierce (Down + Heavy Punch)
Both can be punishable if the opponent blocks low enough, but if you're competant, use either that feels good to you. If one connects while they're not blocking you could immediately chase the input with a Gamma Charge or a Gamma Crush if you have the meter.
BEST JUMP IN POKE
Jump Short (Up + Light Kick)
It has the best distance for an air to ground poke even if it doesn't have the priority of a Roundhouse. Mix the big kick in though.
BEST CROSSUP
Crouch Fierce (Down + Heavy Punch)
The vid gets cheeky about it, but his cross-up is really the Crouch Fierce when someone goes to cross you. A lot of times it can trade, so get your timing down for it or simply block their cross-up, then let em have it.
BEST AIR TO AIR
Air Short, Air Jab, Air Forward...
Keep the dogfights at a minimum with Hulk, but if they're really open, hit em with one of these or the next button.
BEST AIR HEAVY
Air Fierce / Super Jump Air Fierce
This air Norm has a bit of utility to it. You can pause a regular jump on a fall for a few frames and it can give you a slight directional change using it on Super Jumps. As always, watch out doing those too close to an opponent during the recovery time, but this Normal's priority also helps it cancel some opponents attacks.
These are fun to discover. You can either go test a few out for yourself or you can spy on some here to see the Clap do its thing in a bopping montage. [AV1 - 12:00]
COMBOS
Your Combo platters are in the video as well as the teased clap tech from Part 1!
Marvel Super Heroes HULK Starter Guide PART 2


